Whether you’re a professional nail technician or a beginner experimenting with at-home manicures, an electric nail drill is a versatile tool that can elevate your nail care game. Designed to file, shape, and buff nails with precision, these devices are no longer just for salon experts—they’re becoming a staple in beauty routines everywhere. Let’s break down how electric nail drills work, their benefits, and tips for using them safely and effectively.
What Is an Electric Nail Drill?
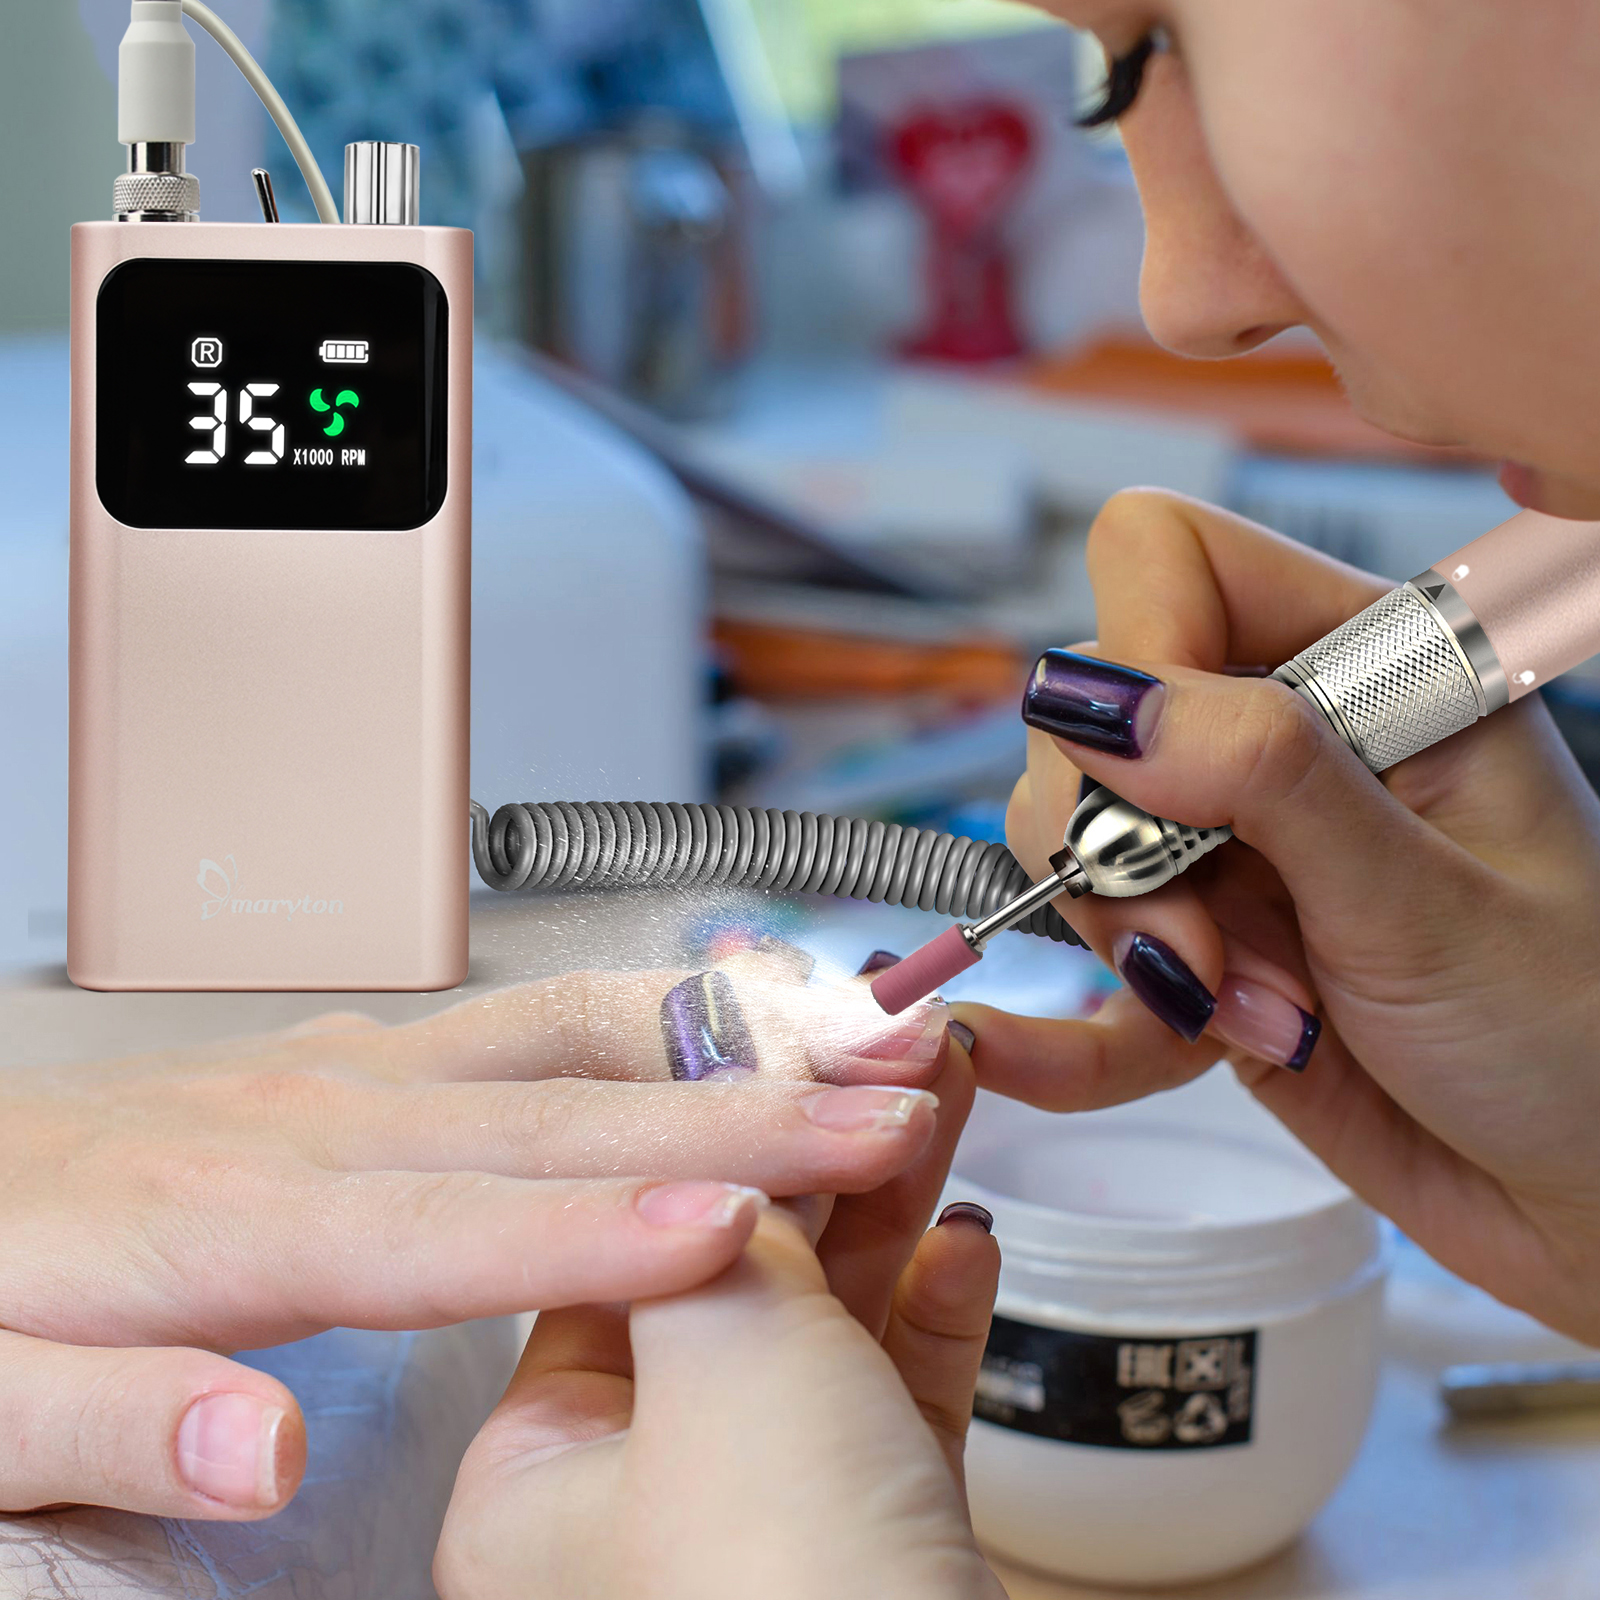
An electric nail drill (or e-file) is a handheld device that uses a rotating bit to gently remove excess nail material, smooth edges, or prep nails for extensions or polish. Unlike manual files, it offers adjustable speed settings and interchangeable bits for different tasks, making it faster and more efficient. Most models are rechargeable, and lightweight, catering to both salon and personal use.
Key Parts of an Electric Nail Drill
- Motor: Powers the rotation of the drill bits.
- Speed Control: Adjustable settings (usually 1,000 –35,000 RPM) for precision.
- Drill Bits: Interchangeable attachments for cutting, shaping, or polishing.
- Forward/Reverse Switch: Lets you change the rotation direction for better control.
Step-by-Step Guide to Using an Electric Nail Drill
1. Prep Your Nails and Tools
- Sanitize: Clean your nails and disinfect the drill bits (especially in salons).
- Choose the Right Bit: Select a bit based on your task.
- Set the Speed: Beginners should start at a low speed; pros can go higher for tough materials.
2. Basic Techniques for Beginners
- Hold the Drill Correctly: Grip it like a pencil, and rest your hand on a stable surface to avoid slips.
- Work at a 45-Degree Angle: Glide the bit lightly across the nail—never press hard.
- Move in One Direction: Avoid back-and-forth motions to prevent heat buildup or damage.
- Focus on Problem Areas: Gently smooth ridges or shorten overgrown nails.
3. Advanced Tips for Professionals
- Remove Extensions Safely: Use a coarse bit to thin out acrylic or gel without touching the natural nail.
- Prep for Polish: Buff the nail surface with a fine bit to help polish adhere better.
- Clean Cuticles: Switch to a cone-shaped bit for precise cuticle work.
Why Pros and Beginners Love Electric Nail Drills?
- Speed and Efficiency: Complete manicures in half the time compared to manual filing.
- Precision: Tackle intricate designs, hard-to-reach corners, or thick acrylics effortlessly.
- Versatility: One tool handles filing, shaping, cuticle care, and even callus removal (with specialized bits).
- Cost-Effective: Reduces physical strain for technicians and minimizes errors for DIY users.
Choosing the Right Drill for You
For Salons: Opt for high-powered, durable models with multiple speed settings.
For Home Use: Compact, quiet drills with beginner-friendly features.
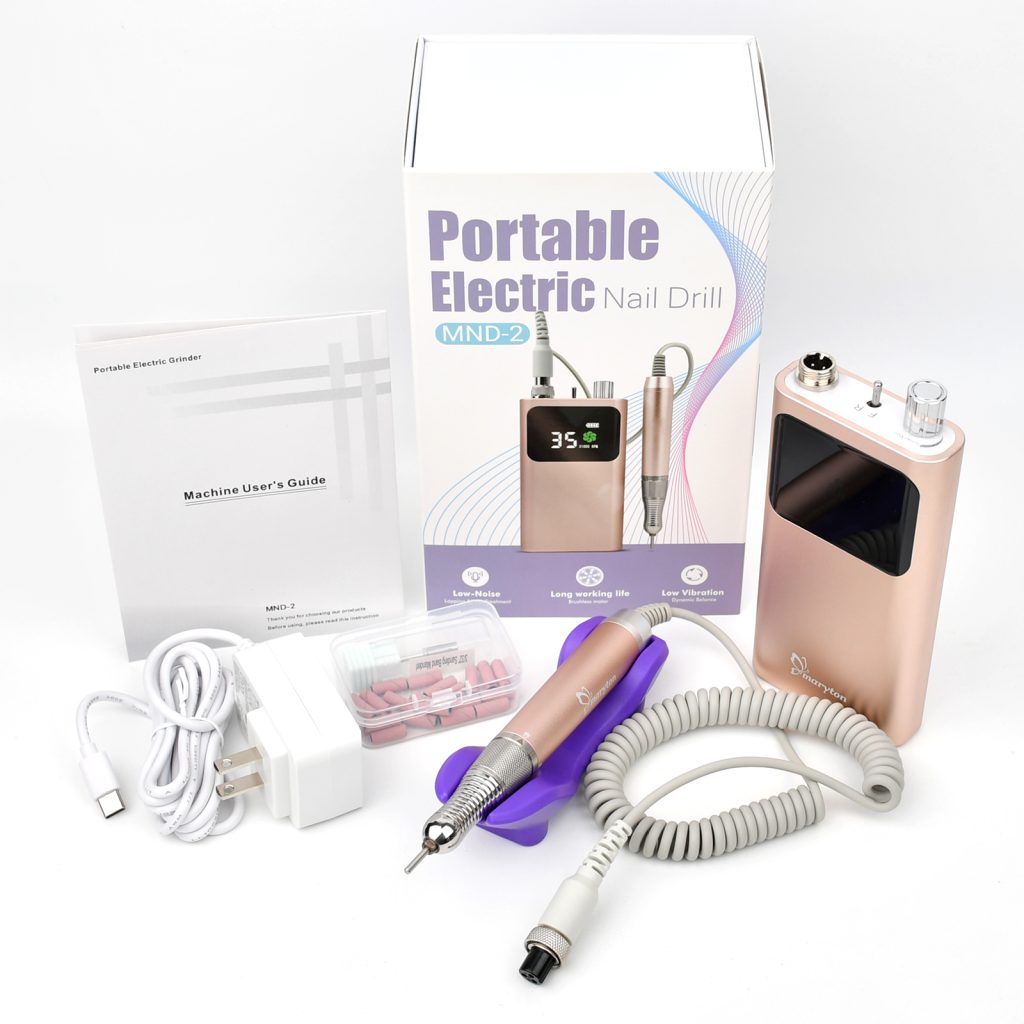
😘 Maryton Nail Supply has launched a portable nail drill machine that can be used in both beauty salons and at home.
Maintenance Tips
- Clean dust from the drill’s vents after each use.
- Replace worn-out bits to maintain performance.
- Charge the battery fully before storage.
Conclusion
Electric nail drills are revolutionizing nail care by blending salon-quality results with user-friendly design. With practice, even beginners can master techniques like shaping almond nails or prepping for gel polish, while professionals can work faster and more precisely. Remember: Patience and proper technique are key. Start slow, prioritize safety, and soon you’ll wonder how you ever managed with a manual file!
Read also: Trendy colors to wear on your nails in May